Creating a Preview Layer in the iOS app Using Gradient Overlay

SwiftUI gradient has many applications in a real app. One such application is preview overlay. Websites and apps often show us partial content as a preview before we can either subscribe or pay to view the full content. In this post, we will see how to create a preview layer for content using gradient overlay.
We will use a Linear Gradient API in SwiftUI to create this preview and let's call a view providing this preview layer a GradientOverlay.
Making a backing text view for overlay
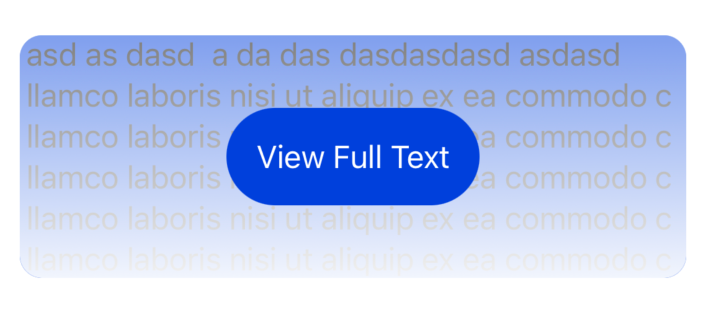
Before we actually get to the overlay, we will first make a text view with demo content. This content will be partially obscured by the overlay. The user can press another button to view the full version.
I have added some decorations to this text view, but generally speaking, this content can be anything as long as it conforms to View protocol.
struct GradientOverlay: View {
var body: some View {
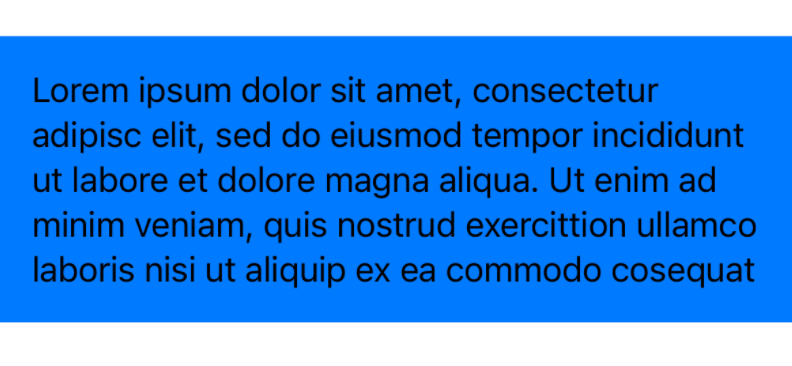
Text("Lorem ipsum dolor sit amet, consectetur adipisc elit, sed do eiusmod tempor incididunt ut labore et dolore magna aliqua. Ut enim ad minim veniam, quis nostrud exercittion ullamco laboris nisi ut aliquip ex ea commodo cosequat")
.padding()
.frame(maxWidth: .infinity)
.background(Color.blue)
}
}
Creating and Overlaying a Preview Gradient
Next, let's write a private ViewBuilder function to create a preview gradient. The purpose of separating it into its own function is that we can keep the view body smaller, call this ViewBuilder multiple times without having to duplicate the code, and also improves the readability due to separation of concerns.
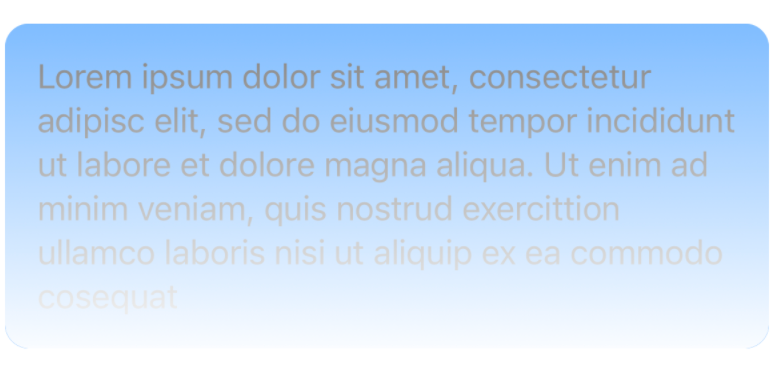
This gradient we are going to use is of a type LinearGradient that will start at the bottom with the white color of opacity 0.98 and will end on the top with white color but with the opacity of 0.5.
@ViewBuilder private func getGradientOverlay() -> some View {
    LinearGradient(gradient:
                    Gradient(stops: [
                        .init(color: Color.white.opacity(0.98), location: 0),
                        .init(color: Color.white.opacity(0.5), location: 1.0)
                    ]),
                   startPoint: .bottom,
                   endPoint: .top
    )
}
Let's add this gradient as an overlay to the text view. To improve the presentation, we can also add rounded corners to the view after the overlay is added.
var body: some View {
    Text("Lorem ipsum dolor sit amet, consectetur adipisc elit, sed do eiusmod tempor incididunt ut labore et dolore magna aliqua. Ut enim ad minim veniam, quis nostrud exercittion ullamco laboris nisi ut aliquip ex ea commodo cosequat")
        .padding()
        .frame(maxWidth: .infinity)
        .background(Color.blue).overlay (
            getGradientOverlay()
        ).cornerRadius(12)
}
GradientOverlayContainerView
This is great that we were able to add a white overlay to a given text view. But this is going to be limited to only the text view in this view. If you want to add a similar overlay to other views in your application, you need to copy and paste the overlay code. This is not good. Let's make things generic by creating a GradientOverlayContainerView which will create its own gradient internally. The client can pass any content it wants (As long it conforms to View protocol) and GrdientOverlayContainerView will apply the overlay to it no matter what the content.
With refactoring, our code will look like this
struct GradientOverlayContainer<Content: View>: View {

    let content: Content

    init(@ViewBuilder content: () -> Content) {
        self.content = content()
    }

    var body: some View {
        content.overlay (
            getGradientOverlay()
        ).cornerRadius(12)
    }

    @ViewBuilder private func getGradientOverlay() -> some View {
        LinearGradient(gradient:
                        Gradient(stops: [
                            .init(color: Color.white.opacity(0.98), location: 0),
                            .init(color: Color.white.opacity(0.5), location: 1.0)
                        ]),
                       startPoint: .bottom,
                       endPoint: .top
        )
    }
}
And now with the overlay container ready, we can make as many overlays as we want with just a few lines of code.
struct GradientOverlayContainer_Previews: PreviewProvider {
    static var previews: some View {

        let textView = Text("Lorem ipsum dolor sit amet, consectetur adipisc elit")
            .padding()
            .background(Color.green)

        GradientOverlayContainer {
            textView
        }

        let button = Button("Click Me") {

        }.padding().background(Color.orange)

        GradientOverlayContainer {
            button
        }

        GradientOverlayContainer {
            Image("dog")
                .resizable()
                .frame(width: 300, height: 198)
        }
    }
}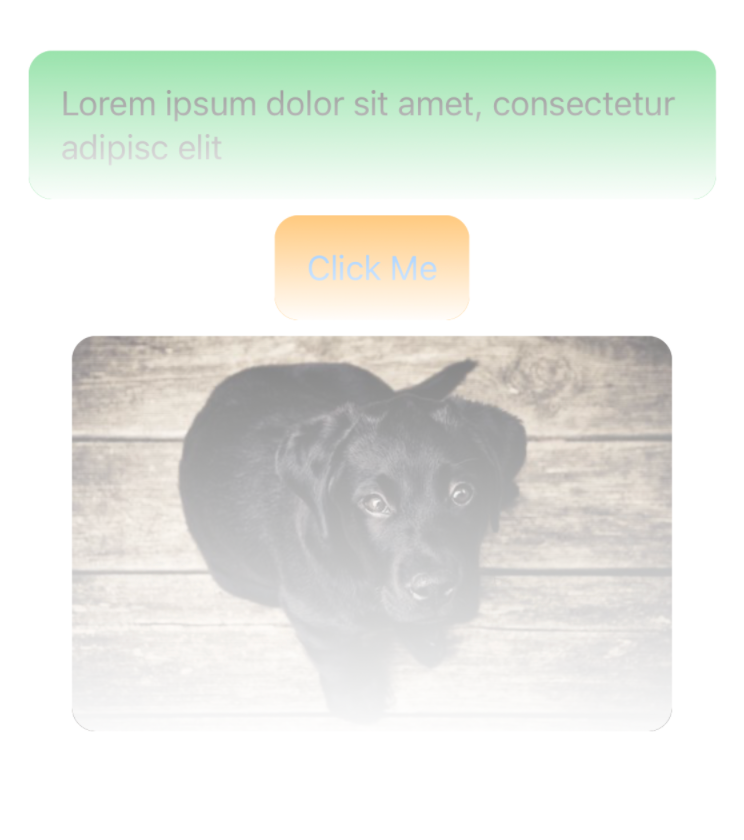
And so on!
Summary
That wraps up our today's post about one of the applications of SwiftUI gradients for creating a preview layer on top of the content. Hope this was informative and useful. Do you know any other applications for SwiftUI gradients? What are some of the great points and gotchas while using the gradient layer in SwiftUI?
Thanks for your time reading this article. If you have any comments, questions, or feedback about this post, feel free to reach out to me on Twitter @jayeshkawli.

