Handling Expected Unit Test Failures in Swift and Xcode


Xcode allows developers to make unit testing efficient and free from noise by skipping certain tests with known failure. There are many cases where engineers want unit tests to effectively catch failing code. But how about those where they know tests will fail, but still want to keep those tests around?
Maybe they know failures are expected, they are temporary, happening due to known system limitations or you just don't have enough time to debug and investigate the cause of failure. Obviously, you don't want to keep them around forever, but you can at least keep the system free from unwanted noise when you know the failures are expected for some time.
Before Xcode 13 introduced XCTExpectFailure API, there were two ways you could handle expected failures in tests,
- Disabling Tests
- Skipping Tests
Disabling Tests
If you know any test is failing and that's the expectation based on some situations I mentioned here, you can decide to temporarily disable them.
For example, I have a test testThatFunctionSeparatesZerosAndOnes that checks whether the function is able to correctly separate out 0's and 1's from the given array,
class Practice2021Tests: XCTestCase {
    func testThatFunctionSeparatesZerosAndOnes() {
        var input = [0, 1, 0, 1, 1, 1, 0]

        let cls = MyClass()

        cls.separateZerosAndOnes(input: &input)

        XCTAssertEqual(input, [0, 0, 0, 1, 1, 1])
    }
}
When I run the test suite, for some reason, my test is failing. Unfortunately, I don't have enough time to fix them. I also don't want the build system to unnecessarily catch this failure every time when I specifically know this is expected.
In this case, I can decide to temporarily disable this test until the root cause is known and the test is fixed.
Below are the step-by-step instructions on how to disable any tests in Xcode.
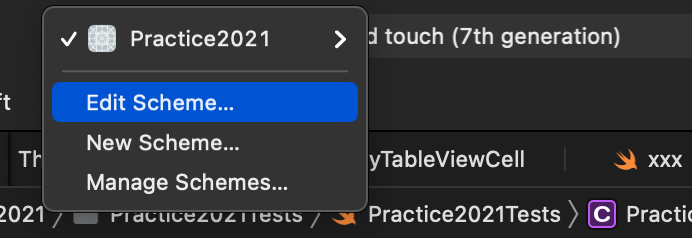
- Click on the target and choose
Edit Scheme
2. Choose Test in the left-hand side menu and select the Info tab. Under that, you will find options to enable/disable individual tests, the entire test suite, or only tests in the single file
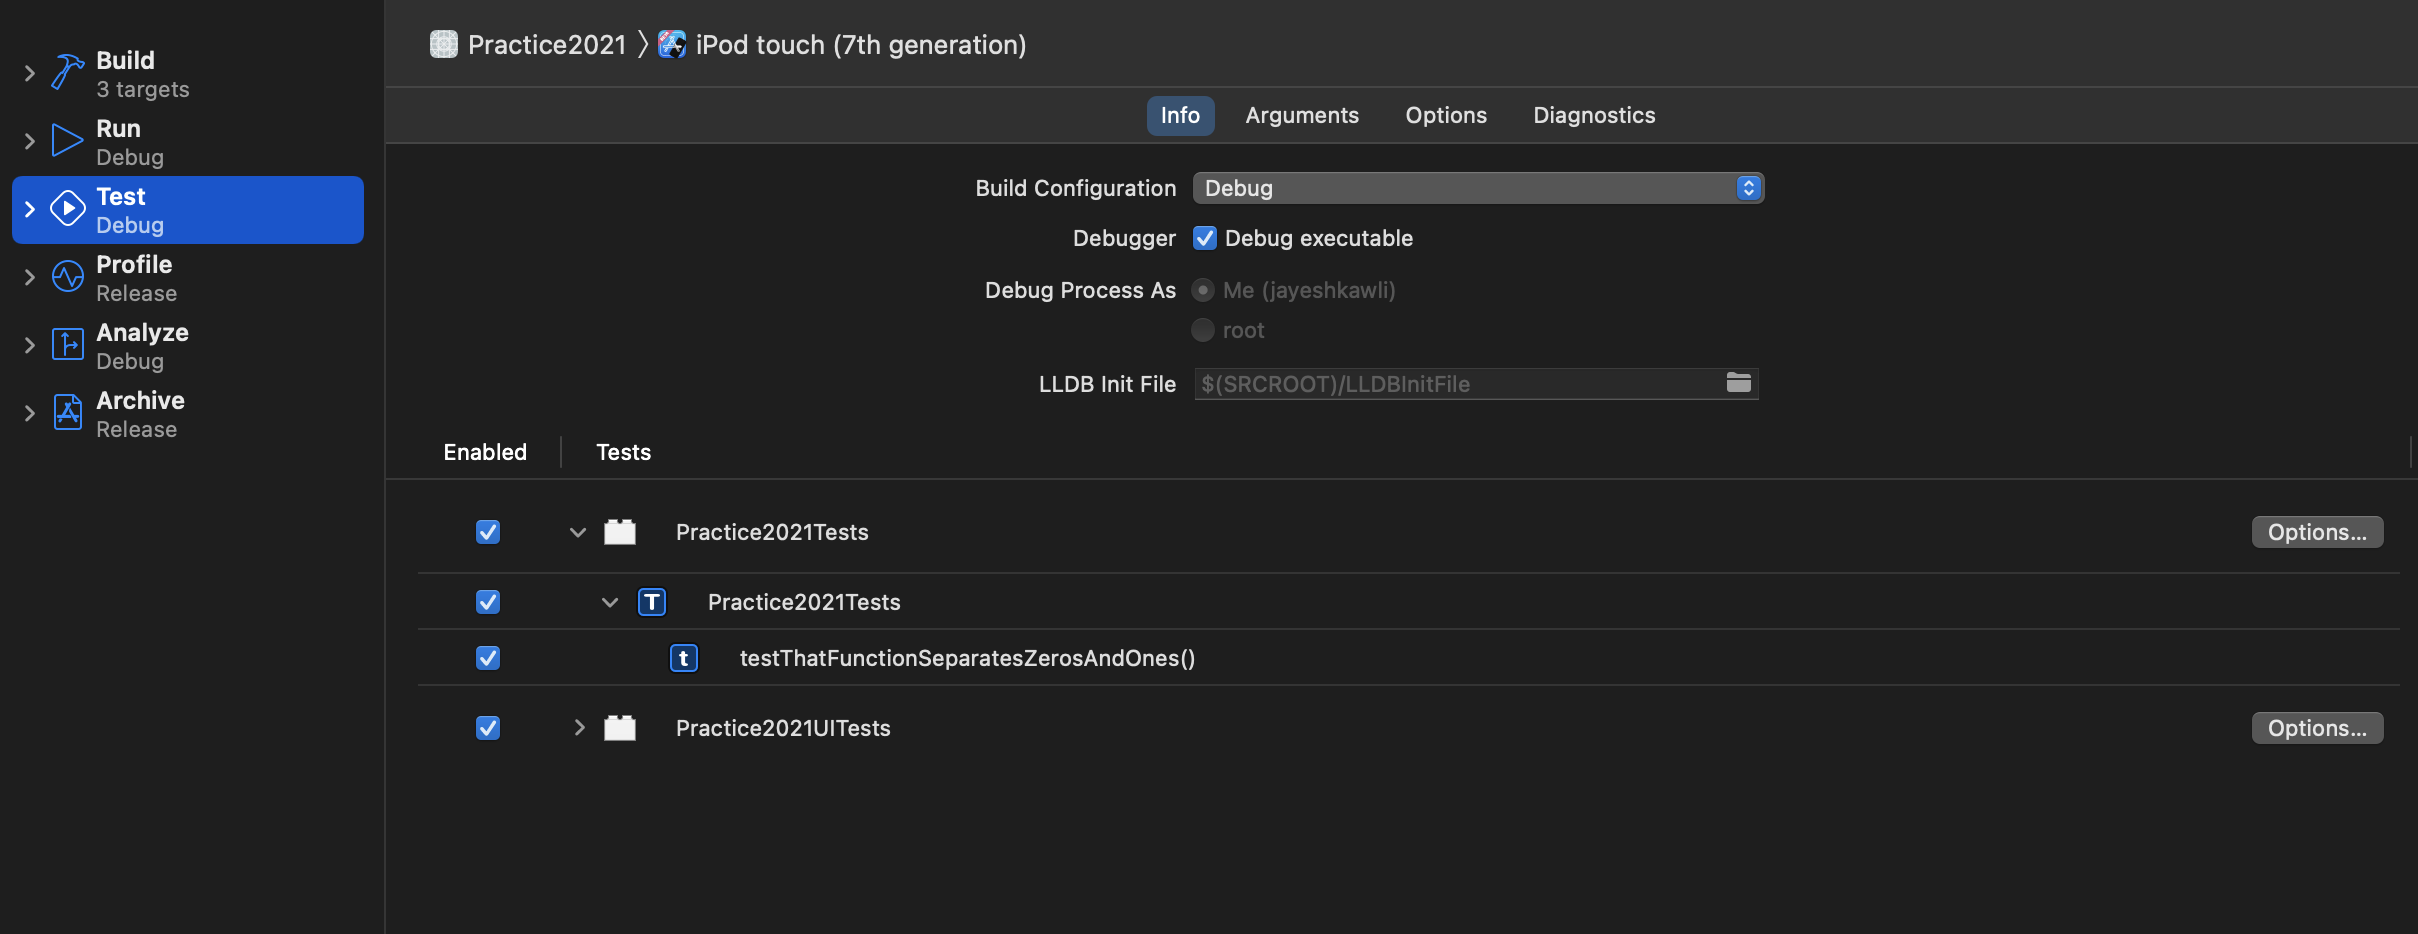
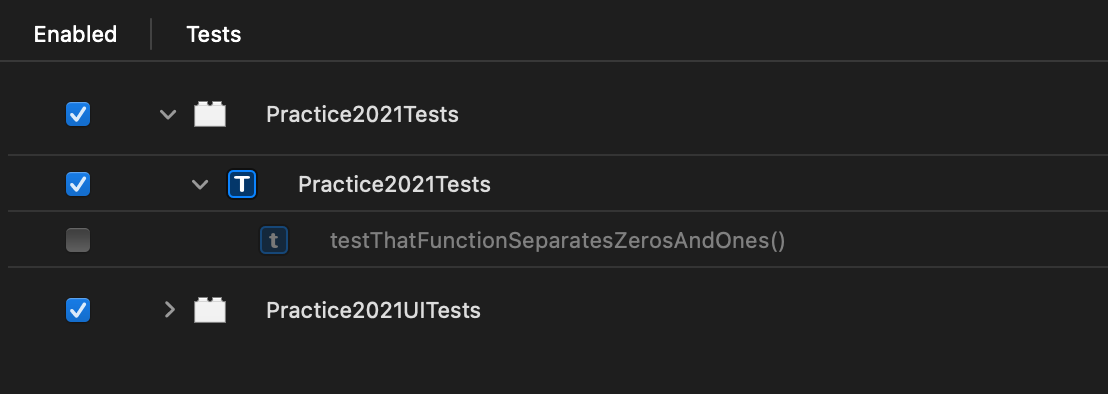
In this case, I only want to disable a single test testThatFunctionSeparatesZerosAndOnes, so I will uncheck only that row.
So next time I run the test suite, it skips the disabled test and the failure is not reported at all. Since the test is not run at all, you won't see it in the test report. So don't be alarmed if the test suite is run and you cannot find this test in the report.
Skipping Tests
In the previous approach, the disabled tests do not appear in the test report, so it's a bit difficult to track them in the long term. If engineers cannot see it, the chances are, it probably won't be fixed.
The better option is to skip the test so that it will appear in the generated test report, but won't be run until the failure is fixed.

You can skip the test by using XCTSkip API defined in the XCTest framework. There are three ways of using XCTSkip API.
Throwing XCTSkip error from the test function
XCTSkip API allows developers to throw an error of type XCTSkip if a certain condition is met so that it exits early from the test function and further test code is not evaluated.
For example, we have a test testThatViewAppearsCorrectOnIPad that creates a custom view, adjusts its size, and then verifies whether its dimensions are correct on iPad.
func testThatViewAppearsCorrectOnIPad() {

    let view = CustomView(frame: CGRect(x: 0, y: 0, width: 320, height: 540))
    view.adjustSize()

    XCTAssertEqual(view.frame.size, CGSize(width: 500.0, height: 500.0))
}
since this test is only applicable on iPad devices, we will add a guard statement that forces it to run only on iPad devices. If any other device is used, we will throw an error XCTSkip with skip reason and the test will be skipped.
func testThatViewAppearsCorrectOnIPad() throws {
guard UIDevice.current.userInterfaceIdiom == .pad else {
throw XCTSkip("Skipping test. Test only applicable for iPad devices")
}
let view = CustomView(frame: CGRect(x: 0, y: 0, width: 320, height: 540))
view.adjustSize()
XCTAssertEqual(view.frame.size, CGSize(width: 500.0, height: 500.0))
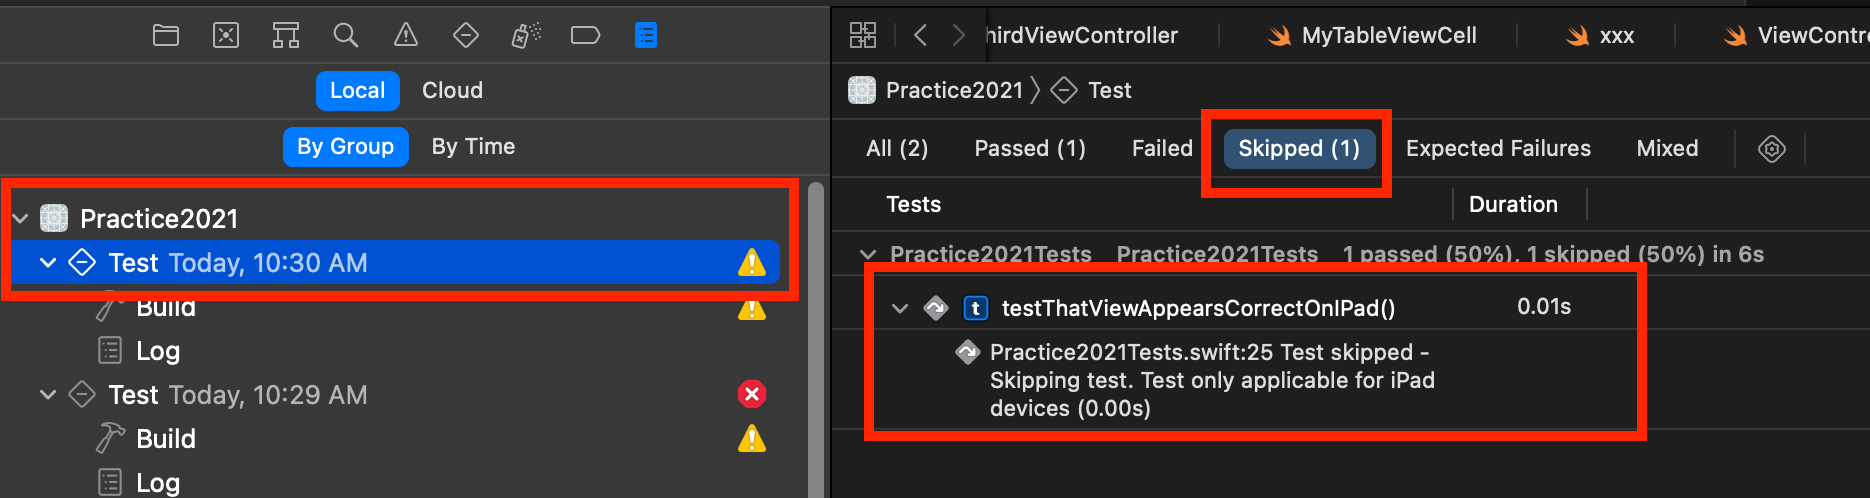
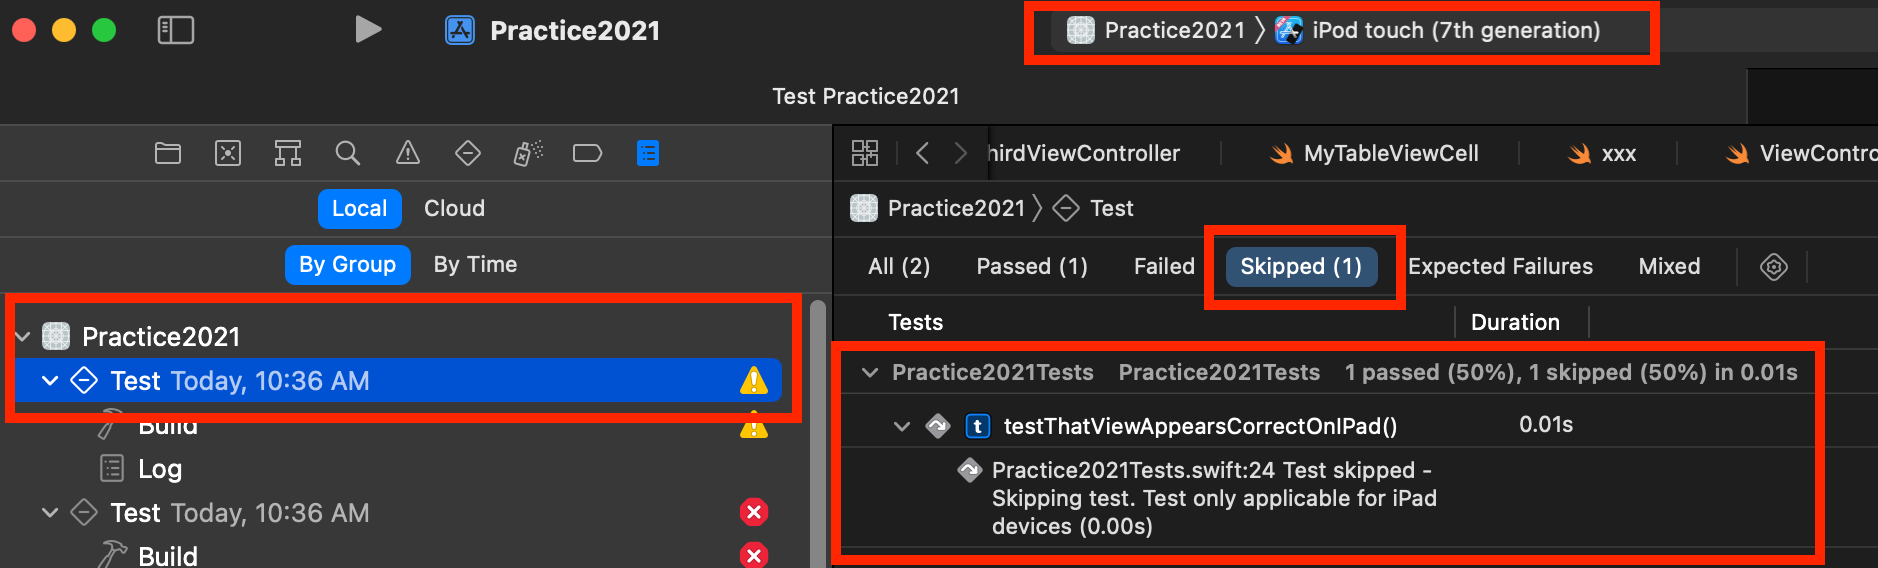
}As you can see in the test report, it provides the ability to view only skipped tests with the reason why the test was skipped. Compared to the previous approach, it provides better visibility so that you can keep track of skipped tests and take the action later.
Adding condition to skip the test using XCTSkipIf
In addition to the previous API, you can also use XCTSkipIf which allows skipping the test only if a certain condition is satisfied. Referring to the earlier example, we want to skip the test only if the current device is not an iPad.
Since XCTSkipIf throws an error, we will use this API with a try.
func testThatViewAppearsCorrectOnIPad() throws {

    try XCTSkipIf(UIDevice.current.userInterfaceIdiom != .pad, "Skipping test. Test only applicable for iPad devices")

    let view = CustomView(frame: CGRect(x: 0, y: 0, width: 320, height: 540))
    view.adjustSize()

    XCTAssertEqual(view.frame.size, CGSize(width: 500.0, height: 500.0))
}
As you can see in the test report, since we ran this test on iPod touch, the test is marked as skipped.
Adding an exception to skip the test using XCTSkipUnless
An alternate solution is to use unless clause which skips the test unless a certain condition is true. In our case, we want to skip the test unless the device is an iPad. Again referring to the previous example, we will revert the skip condition to mean "Skip the test unless the device is iPad". Which exhibits the same behavior but the condition is reverted.
func testThatViewAppearsCorrectOnIPad() throws {

    try XCTSkipUnless(UIDevice.current.userInterfaceIdiom == .pad, "Skipping test. Test only applicable for iPad devices")

    let view = CustomView(frame: CGRect(x: 0, y: 0, width: 320, height: 540))
    view.adjustSize()

    XCTAssertEqual(view.frame.size, CGSize(width: 500.0, height: 500.0))
}
Running the Test on iPad
Now let's verify the behavior by combining all the conditions and running our test on iPad. If everything is correct, none of the XCTSkip APIs will be triggered and tests will run as usual.
func testThatViewAppearsCorrectOnIPad() throws {
try XCTSkipUnless(UIDevice.current.userInterfaceIdiom == .pad, "Skipping test. Test only applicable for iPad devices")
try XCTSkipIf(UIDevice.current.userInterfaceIdiom != .pad, "Skipping test. Test only applicable for iPad devices")
guard UIDevice.current.userInterfaceIdiom == .pad else {
throw XCTSkip("Skipping test. Test only applicable for iPad devices")
}
let view = CustomView(frame: CGRect(x: 0, y: 0, width: 320, height: 540))
view.adjustSize()
XCTAssertEqual(view.frame.size, CGSize(width: 500.0, height: 500.0))
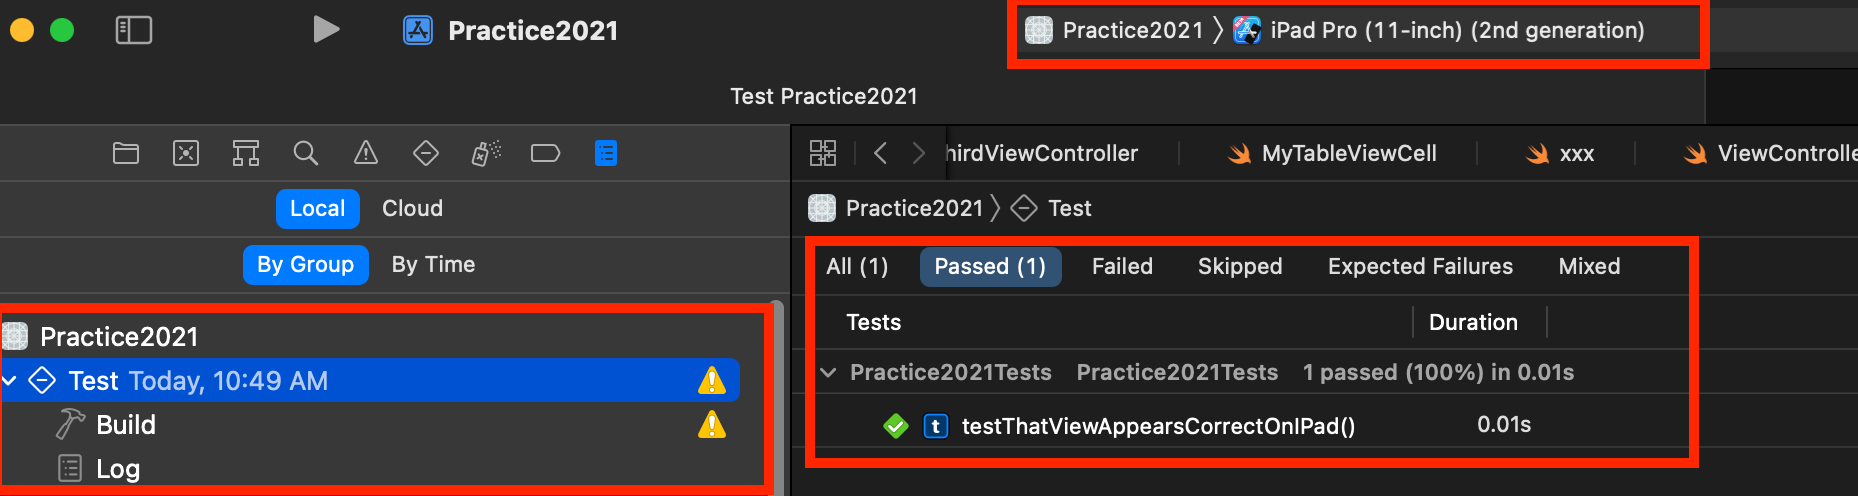
}As you can see from the test report, when the unit test only applicable on iPad is run on the iPad, it successfully runs and shows the run result.
Summary
To summarize, there are at least a couple of ways to ignore test failures on Xcode. When you ignore test failures, make sure you only do it temporarily. Keep track of skips and revisit them in the future to investigate and fix the failure so that the integrity and stability of code are guaranteed. I like XCTSkip better than just disabling tests because it increases the visibility of tests with expected failures. If you disable your tests, they won't even appear in the test report and might be forgotten forever.
A caveat while using XCTSkip APIs though. You must add it at the beginning of the test function even before Xcode has a chance to evaluate any test-related code. That way you can improve the test execution time as well as avoid unwanted failures when you know that test should've anyway been skipped for that configuration.
I hope this post was useful for giving a few pointers on how to deal with tests with expected failures. In Xcode 13, Apple introduced a new way to handle expected failures by introducing XCTExpectFailure API. We will see how to use it with examples in the next post.
