Making Wayfair logo with CSS

Right now I am so excited to get a job offer from Wayfair Inc. I cannot tell how happy I am. One of the things I liked most about Wayfair was their creative logo. It is as vibrant as it could get.
This weekend having spend my most of the time working on finding apartments and movers I finally had couple of hours to do something creative. It'd been a while since I wrote web code, may it be a CSS, JavaScript or HTML. So I though why not try my brain at recreating Wayfair logo with CSS and HTML?
To give you an idea, here's how Wayfair logo looks like

So, as opposed to my expectation this task turned out to be more challenging and fun than I initially expected. I will save you from reading the entire code, but will take you through the approach I took to make a logo.
Let's make out an hierarchy of subparts associated with this logo first,
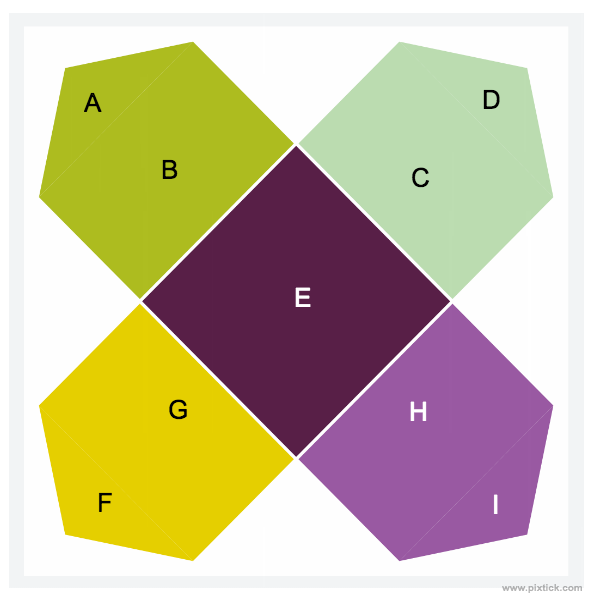
- Center Square (E)
- Top left pointer
- A triangle (A)
- An associated rectangle (B)
- Top right pointer
- A triangle (D)
- An associated rectangle (C)
- Bottom left pointer
- A triangle (F)
- An associated rectangle (G)
- Bottom right pointer
- A triangle (I)
- An associated rectangle (H)
Also, I used a tool to pick colors from images for which I used an original Wayfair logo. This tool actually made my task much easier
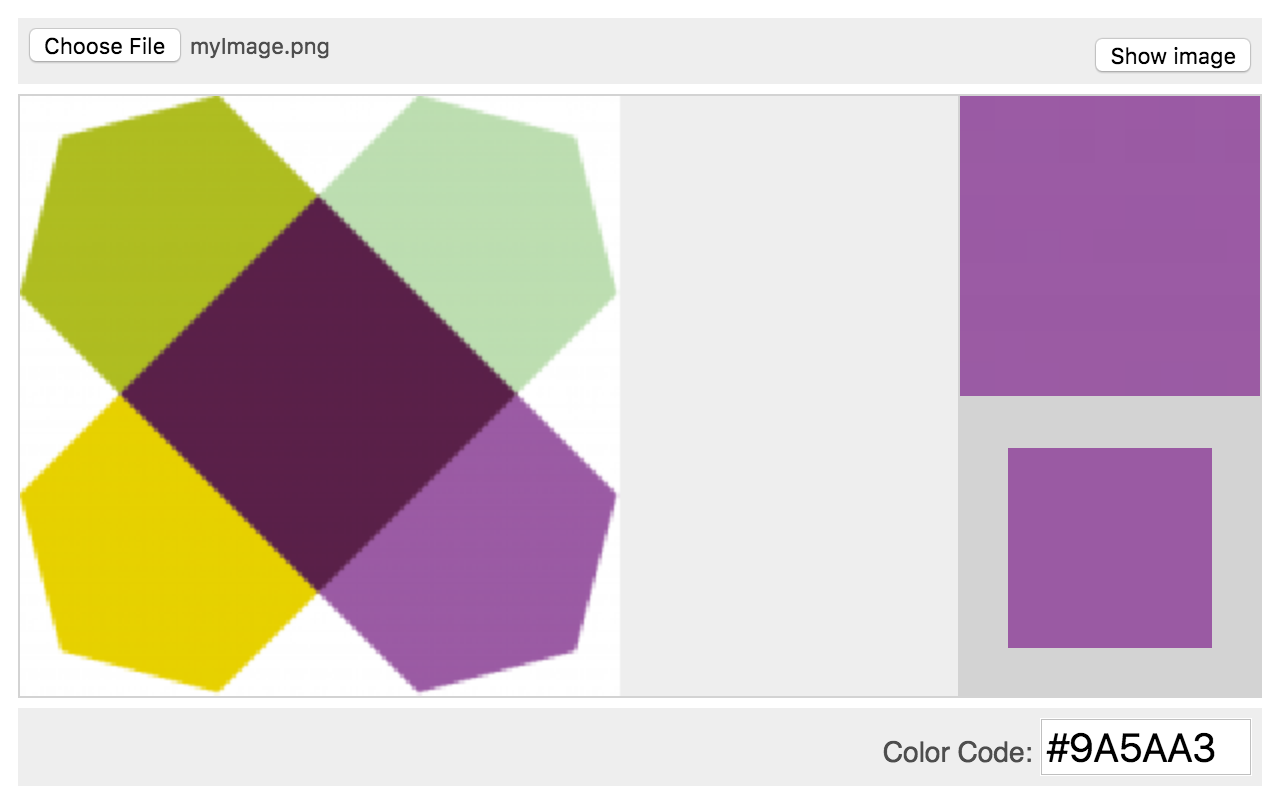
Source: http://html-color-codes.info/colors-from-image
Here are some of the rules I followed
- Use 5 different type of color, each unique for every section
- There are only 2 different type of shapes in terms of size and shape. The one with triangular pointer and other, a center square piece. Albeit they all have different colors
- Triangular shapes which appear on the corner sides are divided into two regions. One with triangular pointer (e.g. A, D, F and I) and other remaining portion (e.g. B, C, G and H)
- Use the similar styles for same shape. Only thing that changes is their position and background color
Here's the timeline of making this logo from scratch along with required screenshots,
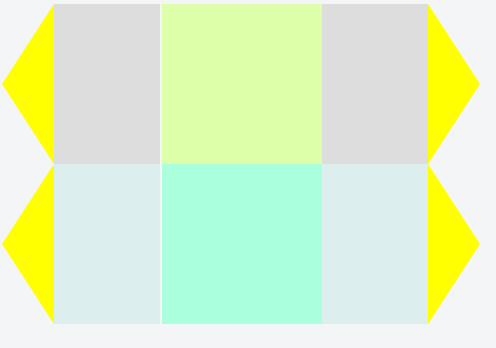
1. Creating scaffold along with main and sub-regions. Used dummy colors to make sure everything is laid out as expected

2. Adding triangular pointers on both end
3. Applying rotational transformation to both bars (45 and -45) and extending parent view (With Red color) to accommodate logo
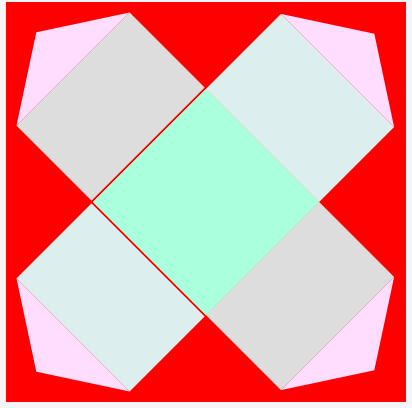
4. Clearing out parent background color
5. Finally adding true logo colors
- Top left corner (#AEBD20)
- Top right corner (#BCDDB1)
- Bottom left corner (#E6D000)
- Bottom right corner (#9A5AA3)
- Center pieces (#592048)

6. At the end I realized that there are tiny spaces around center piece which I got rid of by mistake. So adding these teeny-tiny spaces back.
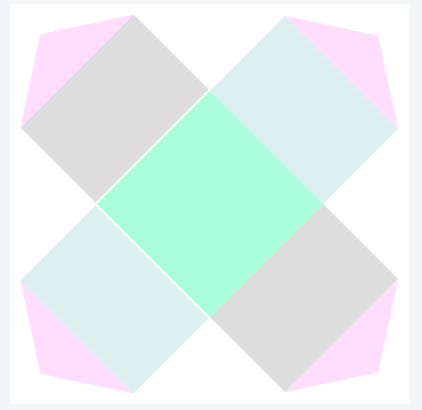
And this is how the final logo looks like

The full code along with HTML and CSS is Hosted on jsFiddle. You can tweak the code and add any more improvements if applicable
For curious, here is the full code with both HTML and CSS styles.
<!DOCTYPE html>
<html>

<head>
    <meta http-equiv="content-type" content="text/html; charset=UTF-8">

    <style type="text/css">
        .topParentView {
            width: 200px;
            height: 200px;
            position: relative
        }
        .innerRectangleView {
            width: 240px;
            height: 80px;
        }
        .floatLeft {
            float: left;
        }
        .innerSquare {
            float: right;
        }
        .innerSquareView {
            float: left;
            height: inherit;
        }
        .shortInnerSquareView {
            width: 26.67px;
        }
        .largeInnerSquareView {
            width: 80px;
        }
        .triangleLeft {
            width: 0;
            height: 0;
            border-top: 40px solid transparent;
            border-right: 26.67px solid #fdf;
            border-bottom: 40px solid transparent;
        }
        .triangleRight {
            width: 0;
            height: 0;
            border-top: 40px solid transparent;
            border-left: 26.67px solid #fdf;
            border-bottom: 40px solid transparent;
        }
        .clearBackground {
            background: white
        }
        .negativeRotatedDiv {
            -ms-transform: translate(-20px, -20px) rotate(-45deg);
            -webkit-transform: translate(-20px, -20px) rotate(-45deg);
            transform: translate(-20px, -20px) rotate(-45deg);
        }
        .topTransformDiv {
            -ms-transform: translate(-20px, 60px) rotate(45deg);
            -webkit-transform: translate(-20px, 60px) rotate(45deg);
            transform: translate(-20px, 60px) rotate(45deg);
        }
        .centerColor {
            background: #592048
        }
        .topLeftColor {
            background: #AEBD20
        }
        .topRightColor {
            background: #BCDDB1
        }
        .bottomLeftColor {
            background: #E6D000
        }
        .bottomRightColor {
            background: #9A5AA3
        }
        .topLeftTriangleColor {
            border-right-color: #AEBD20
        }
        .topRightTriangleColor {
            border-left-color: #BCDDB1
        }
        .bottomLeftTriangleColor {
            border-right-color: #E6D000
        }
        .bottomRightTriangleColor {
            border-left-color: #9A5AA3
        }

        .mediumInnerSquareView {
            width: 53.54px;
            margin-right: -1px;
            margin-left: -1px;
        }
    </style>

    <title>Wayfair Logo</title>

</head>

<body>
    <div class='topParentView clearBackground'>
        <div class='innerRectangleView topTransformDiv'>
            <div class='innerSquareView largeInnerSquareView'>
                <div class='innerSquareView shortInnerSquareView triangleLeft topLeftTriangleColor'></div>
                <div class='innerSquareView mediumInnerSquareView topLeftColor'></div>
            </div>
            <div class='innerSquareView largeInnerSquareView'></div>
            <div class='innerSquareView largeInnerSquareView'>
                <div class='innerSquareView mediumInnerSquareView bottomRightColor'></div>
                <div class='innerSquareView shortInnerSquareView triangleRight bottomRightTriangleColor'></div>
            </div>
        </div>

        <div class='innerRectangleView negativeRotatedDiv'>
            <div class='innerSquareView largeInnerSquareView'>
                <div class='innerSquareView shortInnerSquareView triangleLeft bottomLeftTriangleColor'></div>
                <div class='innerSquareView mediumInnerSquareView bottomLeftColor'></div>
            </div>
            <div class='innerSquareView largeInnerSquareView centerColor'></div>
            <div class='innerSquareView largeInnerSquareView'>
                <div class='innerSquareView mediumInnerSquareView topRightColor'></div>
                <div class='innerSquareView shortInnerSquareView triangleRight topRightTriangleColor'></div>
            </div>
        </div>
    </div>

</body>
</html>

