Swift 4.1 feature - keyEncoding/keyDecoding strategy

Can't believe it's been 3 and half years but I still didn't run a single Swift program over command line. However, that is no longer going to happen. The occasion is an unreleased Swift version 4.1 (As of 02/14/2018) and my desire to try out new cool feature in this release. Of course, I can wait but this opportunity will allow me to try something new and experience this feature early on.
For the sake of convenience, this tutorial is divided into following sections, starting from downloading bleeding edge Swift version to run a Codable feature through the terminal.
-
Downloading Swift 4.1 Development
-
Installing Swift
-
Changing the Swift version used by the command line
-
Setting up the base project
-
Adding demo
-
Some thoughts and observations
- Download Swift 4.1 Development
Since it is too early, Swift 4.1 won't be available through any of the Xcode versions. So our only option is to go to Swift.org page, browse to Downloads section and download the Swift 4.1 Development package which is automatically created from
swift-4.1-branchAfter you download it, double-click the
pkgfile and go through the regular installation process.- Installing Swift
Next step is to verify and install the Swift version that you just downloaded. You can see the currently downloaded Swift snapshots in the default directory under
~/Library/Developer/ToolchainsSo if I want to see all the Swift versions on my machine, I will browse to
~/Library/Developer/Toolchainsand just list of snapshots present under that directory.cd ~/Library/Developer/Toolchains
As you can see from above screenshot, I have two versions installed on my machine. The one that came with
Xcode 9.2and another one I just installed.However, if I run
swift --version, it still shows me the oldSwift version 4.0.3. We need to change it before trying to run any feature exclusive to Swift 4.1.
- Changing the Swift version over the command line
Taken directly from Swift.org page
To select any other installed toolchain (Re: Swift version), use its identifier in the
TOOLCHAINSvariable. The identifier can be found in toolchain’s Info.plist file. Type the following command in terminal/usr/libexec/PlistBuddy -c "Print CFBundleIdentifier:" ~/Library/Developer/Toolchains/swift-4.1-DEVELOPMENT-SNAPSHOT-2018-02-08-a.xctoolchain/Info.plistPlease note how we have pointed above command towards
Swift-4.1 development snapshot. Please make sure to do this to avoid selecting existing Swift versionThis will give us the identifier present in a plist file associated with that Swift version. Which we can now use to select our latest Swift snapshot. For example, if above command gives output as follows,
org.swift.4120180208aThis value can now be used to set the current Swift version as follows,
export TOOLCHAINS=org.swift.4120180208aNow, if you again type
swift --version, it should now point to Swift 4.1
- Setting up the base project
We will now set up the base project to run the demo over command line. Unfortunately, since this is a dev version we cannot use Xcode to run this
Swift 4.1compatible code. First off, you will need to create a scaffold project to run your code with.A. For the simplest case, navigate to the Desktop
cd ~/DesktopB. We will now follow these steps to build executables
Make a directory named
Codableand step into itmkdir Codable cd CodableNow run Swift package's init method with type
executableswift package init --type executableThis will generate an executable package under current directory
C. Now stay in the same folder and run,
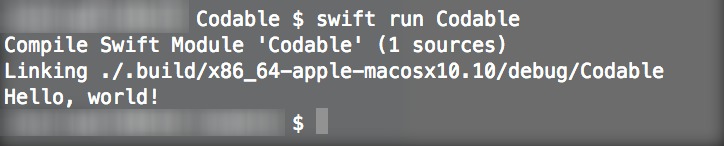
swift run CodableIf everything was done correctly, you will see the following output
Once these steps are done, you're good to start with actual development adding new features that are supported exclusively on Swift 4.1
-
Adding demo
In this step, we will add a demo to show the capabilities of
keyCodingStrategyfeature. Please remember that you are in the base folder of this scaffold project. Every time you runswift run Codable, it will execute themain.swiftfile present inSources/Codablefolder. This file acts as an entry point for this project.Since you're inside one project, it is safe to ignore the word
Codablewhile running the above-mentioned command. You can even run the project with onlyswift runBrowse into
Sources/Codablefolder and make a file calledPerson.swift. This file will represent thePersonstruct we are going to decode incoming JSON into. Add the following content and save the filestruct Person: Codable { let personName: String let personCity: String let personSalary: Int }
Now we will create another file which will have the dummy JSON response. For the sake of simplicity, let's assume this JSON comes directly from the remote API call. Create a file called
jsonResponse.swiftand add following content to it.import Foundation let jsonString = """ [ { "person_name": "Jayesh", "person_city": "Boston", "person_salary": 4000 }, { "person_name": "Amit", "person_city": "Mumbai", "person_salary": 40000 } ] """ let jsonData = Data(jsonString.utf8)In next few lines, we will use this JSON to demonstrate decoding capabilities of new
Swift 4.1featureIn the next and final step, create a file called
customCoding.swiftand add following content to it. This file will contain logic to encode and decode data from JSON.import Foundation func decodeValues() { let decoder = JSONDecoder() decoder.keyDecodingStrategy = .convertFromSnakeCase do { let people = try decoder.decode([Person].self, from: jsonData) // Prints: [Codable.Person(personName: "Jayesh", personCity: "Boston", personSalary: 4000), Codable.Person(personName: "Amit", personCity: "Mumbai", personSalary: 40000)] print(people) } catch { print(error.localizedDescription) } } func encodeValues() { let encoder = JSONEncoder() encoder.keyEncodingStrategy = .convertToSnakeCase let people = [Person(personName: "Pakshata", personCity: "Pune", personSalary: 50000), Person(personName: "Roger", personCity: "Zurich", personSalary: 500)] do { let encodedPeople = try encoder.encode(people) // Prints: [{"person_name":"Pakshata","person_city":"Pune","person_salary":50000},{"person_name":"Roger","person_city":"Zurich","person_salary":500}] print(String(data: encodedPeople,encoding: .utf8)!) } catch { print(error.localizedDescription) } }Also, change the content of
main.swiftfile to call methods toencodeanddecodevaluesdecodeValues() encodeValues()Before you run the code, make sure to run
swift --versionin the terminal and see ifSwift 4.1version is selected. If this is not the case, you can follow the instructions mentioned in step 3 aboveNow you are ready to run the code from command line as follows,
swift run CodableIf everything went well, it will produce the following output,

-
Some thoughts and observations
Swift community has brought us with this new feature to handle snake and camel case painlessly. It's certainly a spectacular improvement. You can verify this change by removing the line which sets
keyDecodingStrategytoencoder/decoderand these operations will throw a missing key exception.It is important to note that even though
keyDecodingStrategyallows us to skipCodingKeys, camel case and snake case keys should be properly mapped to each other. If no valid mapping exists, you will get missing key exceptionSome examples of valid mappings,
firstName - first_name
cityName - city_name
thisIsAwesomeTheroy - this_is_awesome_theory
Some examples of invalid mapping,
params - regex
firstname - first_name
LastPerson - last_person
You might also have observed that how easy it is to create a Swift package and subsequently run the program over command line.
Other caveats are, unless your file is standalone, meaning it does not depend on
methodorstructsoffered by other files, you cannot compile it individually. You will have to compile it together as the entire project. In the above example, you can compilePerson.swiftandjsonResponse.swiftfiles usingswiftc <file_name>command. However, an attempt to compilecustomCoding.swiftwill result in compiler error since this file usesvariablesandstructsprovided by other two files.In addition, you may also need to import appropriate frameworks in related files. For these examples, we are not doing anything fancy so using just
import Foundationworks. But this might not be the case with more complex codes.Sad that at this point
Swift 4.1is still in development. Hopefully, Apple will release the next Xcode version soon and we will all be able to use newCodablefeature in the app, removing all the hard-coded snake case keys
References:

