Using Autolayout to Dynamically Resize UILabel

We all love Autolayout, don't we? I had a less than ideal experience with it when I started. However, after continuous practice and reading a Book - iOS Auto Layout Demystified I got more comfortable with it. However, there are certain cases where it's still possible to solve problem with Auto layout, but it takes time to figure out correct thing to do.
In this post, I will go through few situations where we want grow UILabel as per the content and with additional constraints so that it remains in bounds and will not outgrow its boundary.
Let's go through some of these scenarios and how we can fix them with auto layout.
-
Fixed width, adjustable height
This is the use case whereUILabelcontent is variable. We want to keep the width fixed, but make height variable. Width can either be constrained to both ends or kept fixed in terms of fixed number for width.For all the scenarios described in this post, we will not simply use
UILabel, butUILabeladded as a subView toUIView. Let's first add aUIViewto a scene and add following constraints to it.- Align leading edge to superView
- Align trailing edge to superView
- Align top to superView
- Since we want height to be variable, add constraint for height and make it greater than or equal to. So that the height constraint you provided represents the minimum height that label can have. For our example, we will assume minimum height
UIViewcan have is20px
Now add
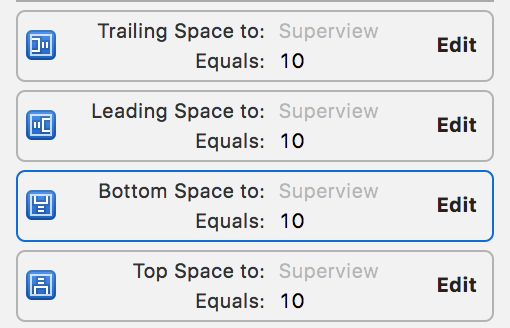
UILabelas a subView of this view and add following constraints with respect to superView.- Align leading edge to superView with
10pxpadding - Align trailing edge to superView with
10pxpadding - Align top edge to superView with
10pxpadding - Align bottom edge to superView with
10pxpadding - Also add a constraint for height to restrain height greater than or equal to zero. This will ensure that
UILabelwill grow as per the content, but also reduces height to zero if there is no content available. - Make
numberOfLinesparameters to zero. This will ensure thatUILabelstretches vertically
You can also color individual views in order to see how they resize as per the content they host
After you've added all the required constraints, it will look like following on storyboard
For
UILabel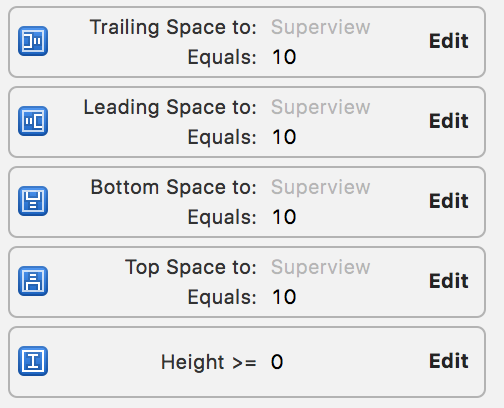
For
UIView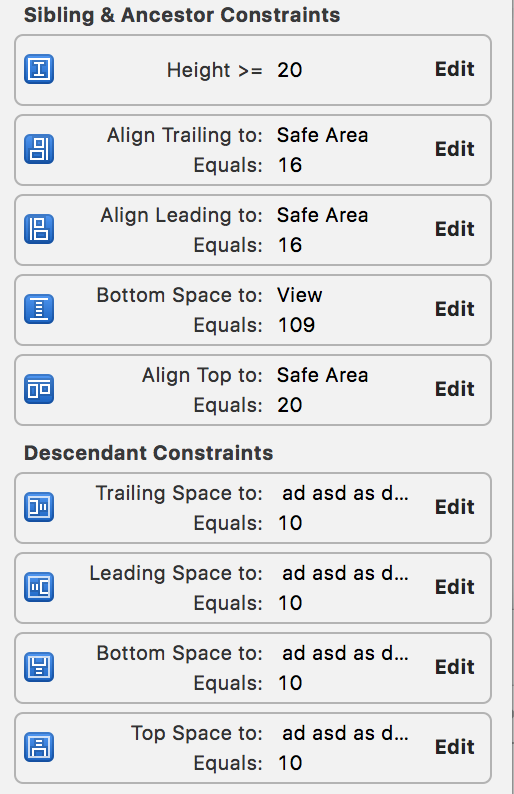
Let's fill the
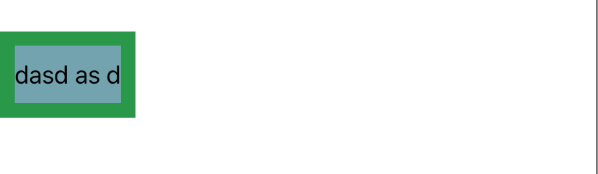
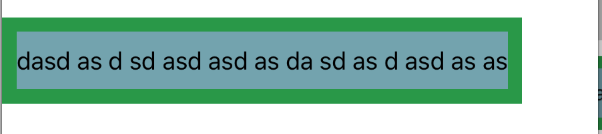
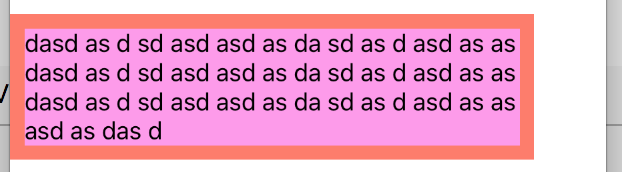
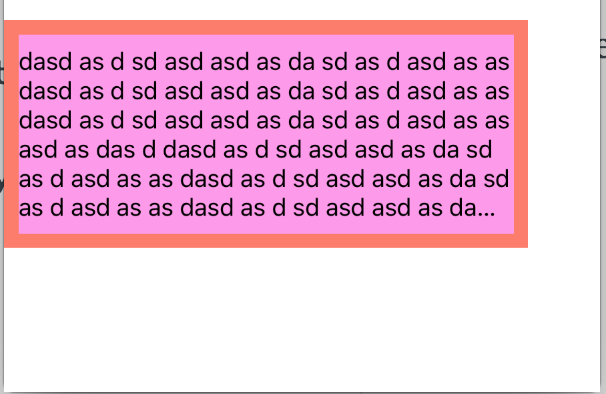
UILabelwith unreasonably long text to see how that will work and run the project and see how that looks in the simulator. With text of reasonable size, you will from screen shot below thatUILabelandUIViewhave grown vertically to accommodate text keeping width fixed.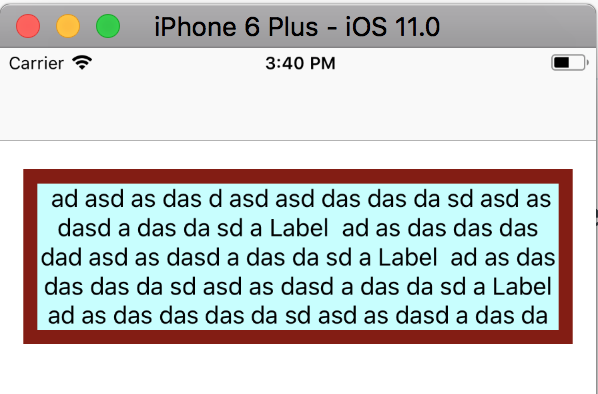
With less text,

With no text,

Please keep in mind that the way constraints are set up for this example,
UILabelorUIViewwill not be able to adjust the size in horizontal direction. That is, even if you have text that does not fill the entire width, unfilled portion of views will remain blank -
Fixed height, variable width
In this case,UILabelwidth grows as per the content. (Keeping in mind any additional padding it may have with respect to other views).However, height remains the same. Additionally you can place constraints on container
UIViewso that it does not quite touch the views boundary.One of the examples where such cases can be used it when you have a tableView/collectionView cell and you want to show the banner in either corner where banner stretches horizontally as per the content, but never grows vertically. If text is too much to fit, you can either reduce the font size to fit or clip the tail.
Like previous example, we will add
UIViewand embedUILabelinside it.Constraints for
UIView:- Align leading edge with superView
- Align top edge with superView
- Constraint for fixed height of
60px - A constraint for trailing edge. It specifies the spacing between this view and superView should be greater than or equal to
50px. This is our padding with respect to right edge - The last constraint will make sure
UIViewstretches with the content ofUILabelit hosts.
Constraints for
UILabel:- Add
UILabelas a subView of previously addedUIView - Let the parameter
numberOfLinesremain to 1. This will make sureUILabelwon't stretch vertically - Add constraints for leading, trailing, top and bottom edges with
10pxpadding for each
Now, let's add some content to test our assumption and constraints.
With less text,
With more text
Thus, we have successfully added the
UILabelwhich stretched horizontally with the text content, does not grow vertically and has an additional horizontal padding on either side -
Variable width and variable height
This is slightly more complicated case compared to earlier cases we discussed. It combines both aspects of previous discussions. Variable width and variable height.Let's start with base
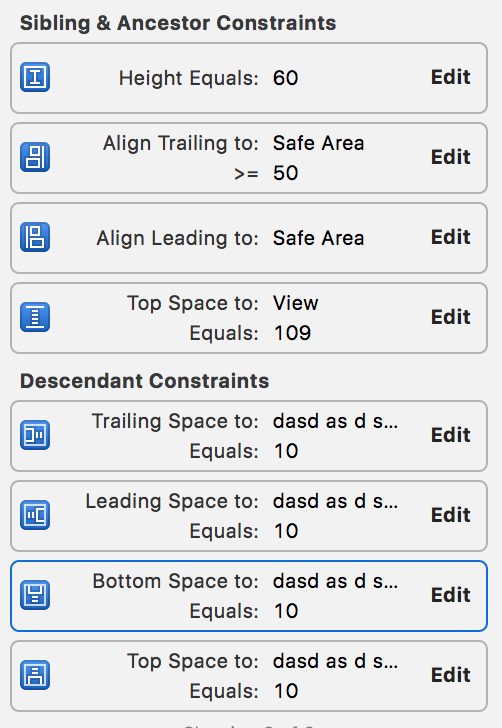
UIViewwhich will act as a container for finalUILabel. We add following constraints to it.- Leading edge constraint with respect to superView
- Trailing edge constraint with respect to superView with
50pxpadding on the end - Height constraint for height to be minimum
20px. This is to accommodate10pxpadding enclosingUILabelis going to have on top and bottom - Bottom alignment to superView
- A constraint for width to be greater than or equal to zero. This will ensure that
UIViewwidth reduced to zero if enclosingUILabelhas no text on it
And now, the Constraints for
UILabel- Trailing padding of
10pxto superView - Leading padding of
10pxto superView - Top padding of
10pxto superView - Bottom padding of
10pxto superView - A constraint for width to be greater than or equal to zero. This will ensure that
UILabelwidth is reduced to zero if it has no text content - A constraint for height to be greater than or equal to zero. This will ensure that
UILabelheight is reduced to zero if it has no text content - Set
numberOfLinesto zero forUILabel. This will ensure that label will stretch vertically with the text content in it
After all the constraints have been added it will look like this on the storyBoard
Constraints for parent
UIView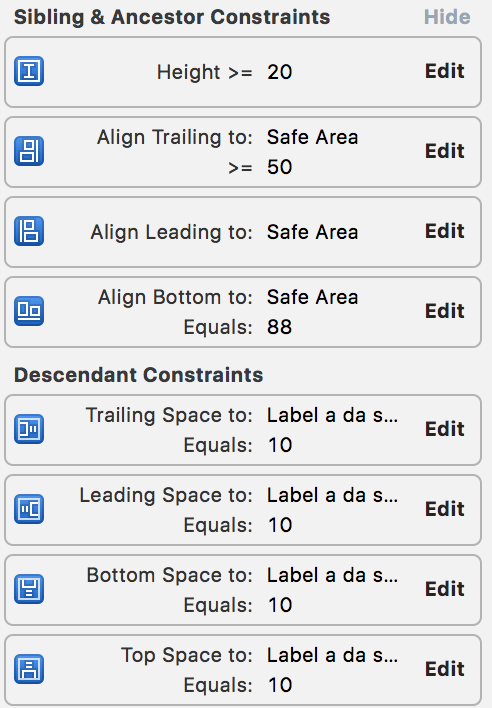
Constraints for enclosed
UILabel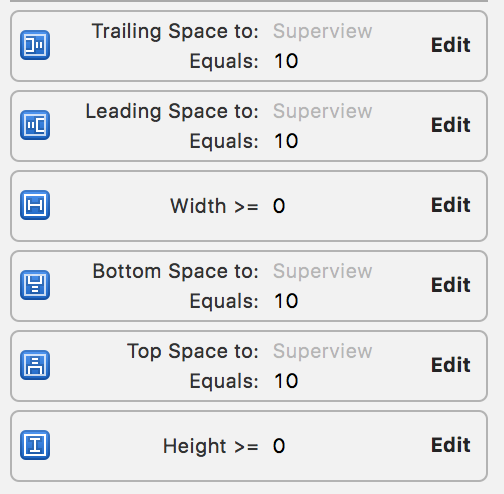
Now once all the constraints are added and views are set up, let's test our constraints with few test cases,
-
No text

-
Text that fits properly in horizontal space

-
Text that does not fit in the horizontal space
-
Text that does not fit in the provided horizontal and vertical space
In this case we decide to clip the content's tail. Alternatively, you can also choose how you want to apply line break - Such as truncate head, middle or by providing minimum font size
This is all I got for today. Autolayout is awesome and with Apple releasing new devices every year, it has become mandatory to use it in every app with support to automatically adjust layout to fit any screen or device. Please let me know if you have further questions about using autolayout for specific use-cases you are building apps for.
This is just the beginning and we have just scratched the surface, If you are interested in more autolayout examples, feel free to clone the Autolayout repo on the Github. It has code examples about tricks we learned in this post and other useful tricks. Pull requests and improvements are welcome too.

