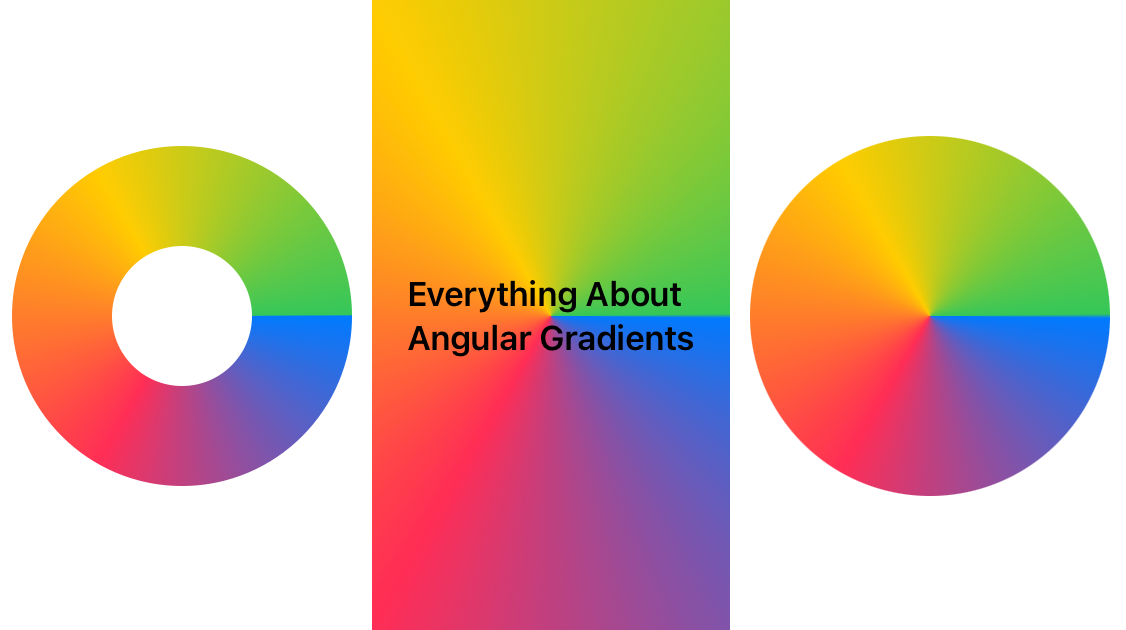
How to Use Gradients in SwiftUI - Angular Gradients

This is the third and final article in my series on gradients in SwiftUI. Previously I published a couple of following articles on SwiftUI gradients.
How to Use Gradients in SwiftUI - Linear Gradients
How to Use Gradients in SwiftUI - Radial Gradients
In today's article, we will learn what angular gradients are and how to use them in SwiftUI with examples and code samples.
What is Angular Gradient?
Apple defines angular gradient as follows,
An angular gradient is also known as a “conic” gradient. This gradient applies the color function as the angle changes, relative to a center point and defined start and end angles
As suggested by the above definition, angular gradient always moves in the radial direction with reference to a pre-defined center. It always appears in a 360-degree angle space with no gaps. Any gaps, if present are filled with the first or last colors defined in the gradient parameter for the angular gradient.
How to define Angular Gradient in SwiftUI
Developers can simply use AngularGradient API to define the angular gradient. This API looks like this,
public init(gradient: Gradient, center: UnitPoint, startAngle: Angle = .zero, endAngle: Angle = .zero)
Gradient initializer takes the following parameters in its initializer,
gradient- Defines colors used in the angular gradientcenter- The gradient center relative to the container to which it is added. For example, it could either be the container center or its top-left or top-right corner. If the gradient is shifted to a center other than the default center, its appearance will vary accordinglystartAngle- Angle at which gradient should beginendAngle- Angle at which gradient should end
We will look at the examples below to see how gradient appearance changes as we tweak these input parameters.
Creating a Simple Angular Gradient
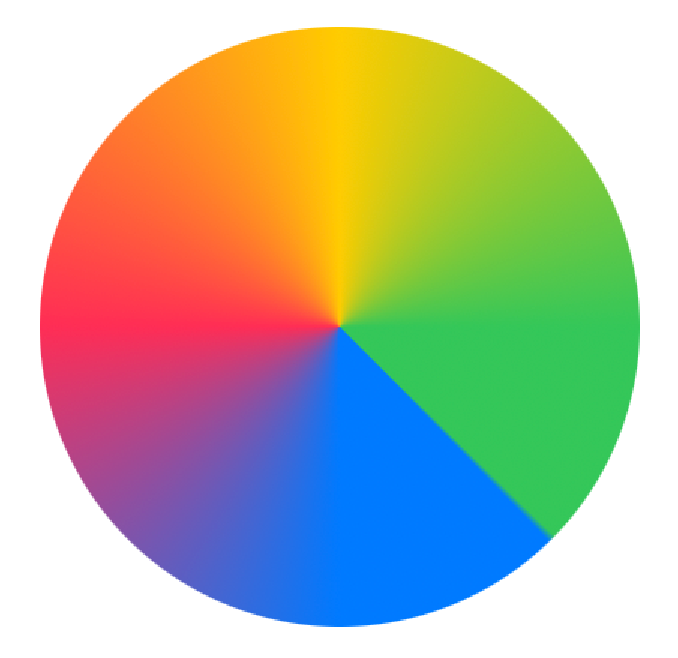
For the simplest case, let's make an angular gradient containing 4 colors. We will use it to fill the square of fixed dimensions and also clip it in a circular shape so that the square length becomes the circle diameter.
let fourColorsGradient = Gradient(colors: [Color.blue, Color.pink, Color.yellow, Color.green])

Rectangle().fill(AngularGradient(gradient: fourColorsGradient, center: .center)).frame(width: 200, height: 200).cornerRadius(100)
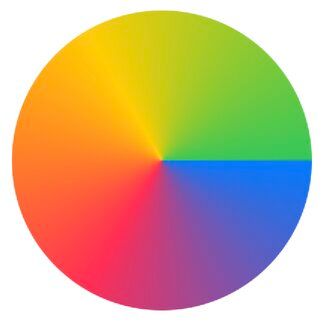
As you can see, it starts at 0 degrees angle, and ends at the same spot and 4 colors are equally divided in the given angular space inside a rectangular container shaped like a circle.
Changing the Center
By default, the gradient center is same as the container. However, we can change it to be anywhere relative to the container. For simple cases, we will position it on a couple of container corners. To stress this point, we will use the rectangular container to make it easier to see where exactly the gradient center lies.
Rectangle().fill(AngularGradient(gradient: fourColorsGradient, center: .topLeading)).frame(width: 200, height: 200)

Rectangle().fill(AngularGradient(gradient: fourColorsGradient, center: .bottomLeading)).frame(width: 200, height: 200)

Rectangle().fill(AngularGradient(gradient: fourColorsGradient, center: .topTrailing)).frame(width: 200, height: 200)

Rectangle().fill(AngularGradient(gradient: fourColorsGradient, center: .bottomTrailing)).frame(width: 200, height: 200)
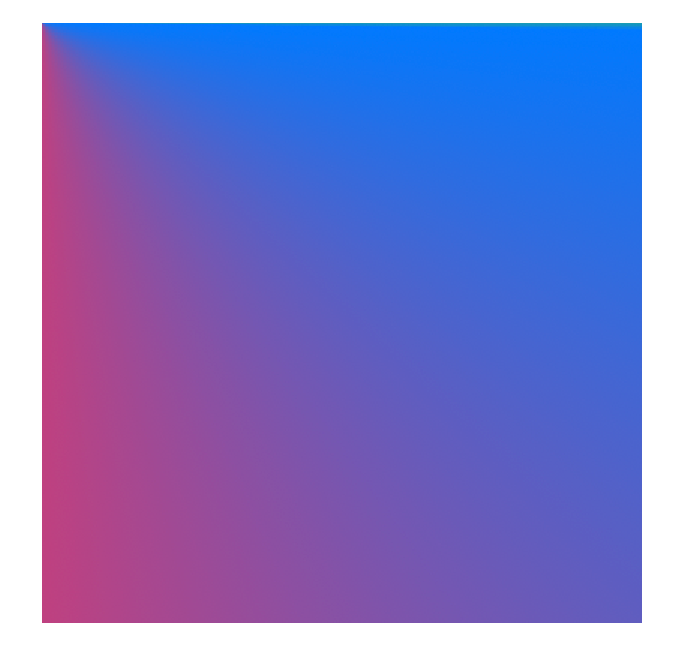
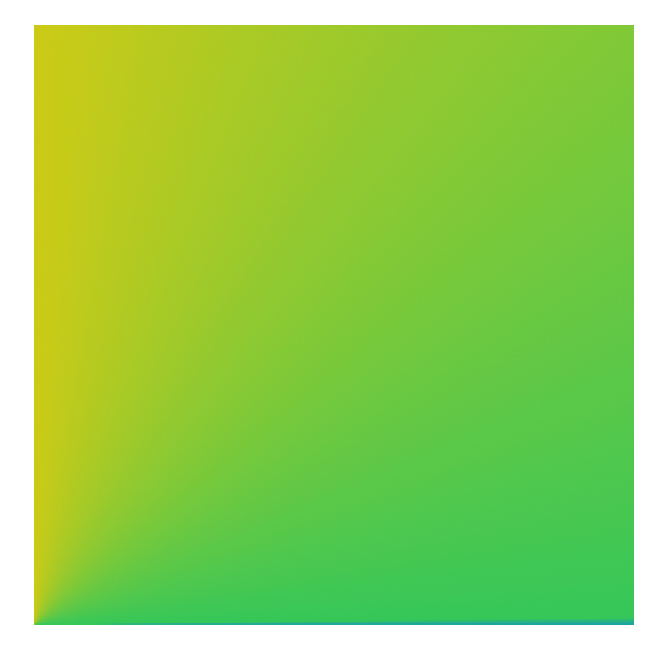
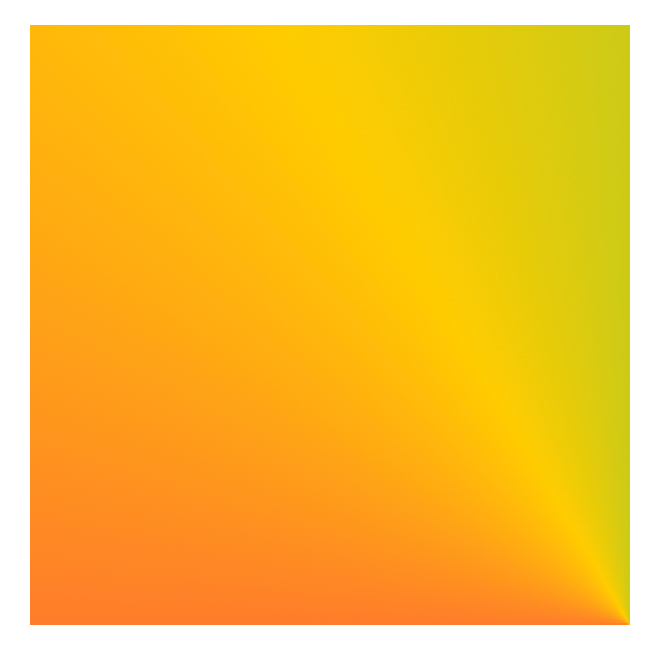
As you can see, as we change the center, the gradient center is fixated on that point, and the rest of the rectangle area is filled by extending available colors in the opposite direction of the center. The part of the gradient not visible in the space above lies outside of the container and thus is not drawn.
Changing the Start and End Angles
Next, we will see how changing star and end angles affect the gradient appearance. By default angular gradient starts at 0 degrees and ends at 360 degrees angle spreading all available colors equally in the given radial space.
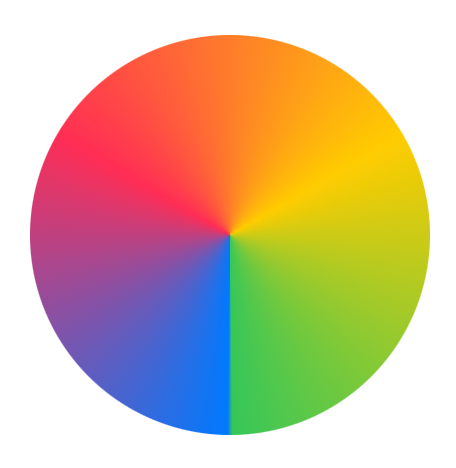
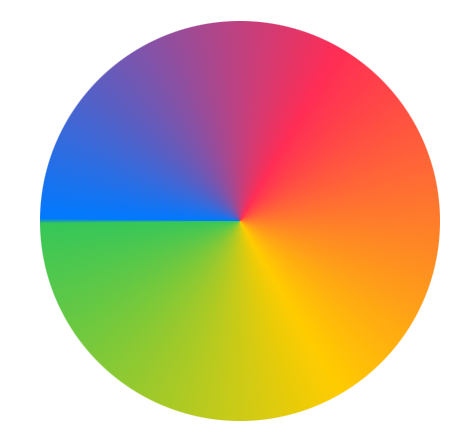
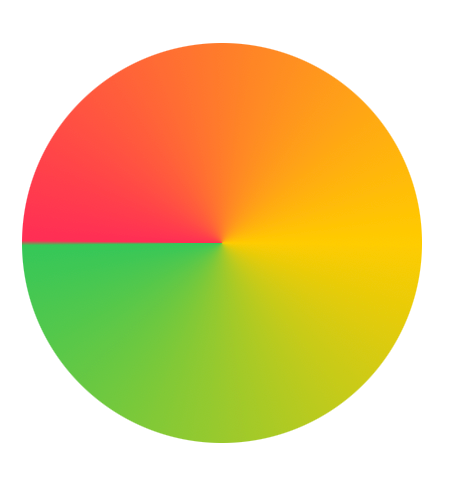
When endAngle - startAngle < 360 degrees
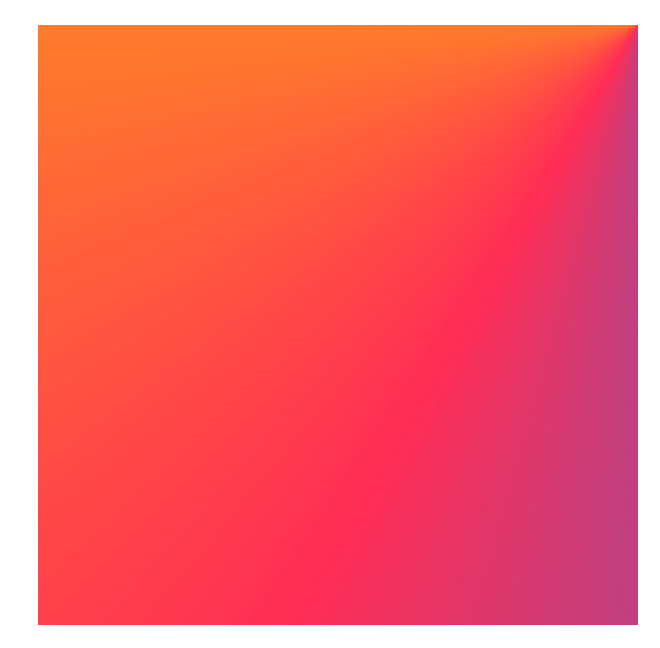
If we change the start angle, the gradient starts at a different angle relative to 0 degrees.
let fourColorsGradient = Gradient(colors: [Color.blue, Color.pink, Color.yellow, Color.green])

Rectangle().fill(AngularGradient(gradient: fourColorsGradient, center: .center, startAngle: .degrees(90), endAngle: .degrees(360))).frame(width: 200, height: 200).cornerRadius(100)


Rectangle().fill(AngularGradient(gradient: fourColorsGradient, center: .center, startAngle: .degrees(180), endAngle: .degrees(360))).frame(width: 200, height: 200).cornerRadius(100)
You can also see how it changes the gradient composition. If the start angle is moved forward while keeping the end angle unchanged, our gradients have less space and thus are non-evenly spread.
As Apple documentation states,
If endAngle - startAngle < 2π, the gradient fills the missing area with the colors defined by gradient locations one and zero
In our cases above, since we have shifted the start angle by more than 0 degrees, the difference between start and end angle is less than 360 and thus it leaves the blank space which is filled by the first and last colors - In this case blue and green colors which gets the highest percentage of space in the gradient.
Effects of changing start angle and end angle on angular gradients
This effect is even more pronounced with another example,
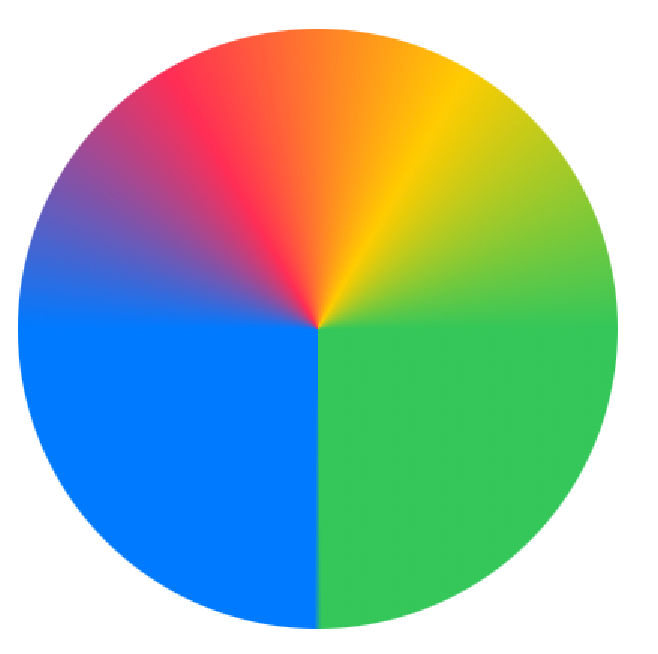
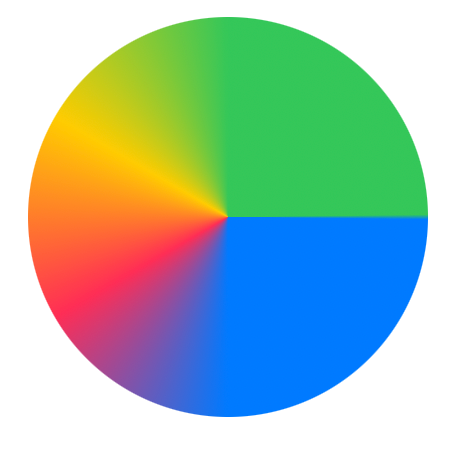
Rectangle().fill(AngularGradient(gradient: fourColorsGradient, center: .center, startAngle: .degrees(90), endAngle: .degrees(270))).frame(width: 200, height: 200).cornerRadius(100)
In the above code, the gradient starts at 90 degrees and ends at 270 degrees. This leaves only 180 degrees area for the gradient to fill in. Rest of the area lying between the start and end colors is equally filled in by them - In this case by green and blue colors
Output:
If we need to keep the same composition for all colors while changing the start angle, we need to increase the end angle by the same value. This results in a rotation effect where everything remains the same except the new gradient now appears rotated.
// Rotated by 90 degrees
Rectangle().fill(AngularGradient(gradient: fourColorsGradient, center: .center, startAngle: .degrees(90), endAngle: .degrees(450))).frame(width: 200, height: 200).cornerRadius(100)

// Rotated by 180 degrees
Rectangle().fill(AngularGradient(gradient: fourColorsGradient, center: .center, startAngle: .degrees(180), endAngle: .degrees(540))).frame(width: 200, height: 200).cornerRadius(100)
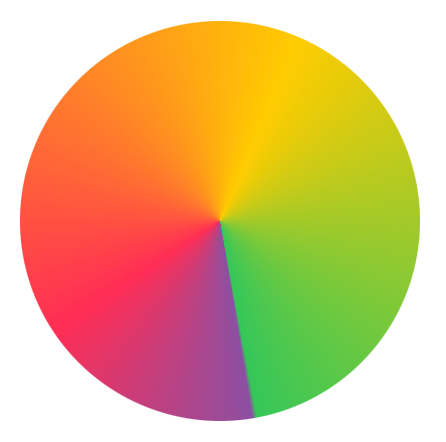
When endAngle - startAngle > 360 degrees
The gradient reacts in a different way when the difference between the end angle and start angle is > 360. As official Apple documentation states,
If endAngle - startAngle > 2π, the gradient only draws the last complete turnWhat it means is, even if you assign > 360 space to color gradients, it can only fit colors in the 360 angular space. If it overflows, it only shows the last X% of the total gradient in the given 360 degrees space.
For example, let's say you create a 4-color angular gradient in angular space ranging from 0-540 degrees angle. However, there is only 0-360 degrees space on the circle, so it will chop the first 180 and will only show the last 360 degrees part on the gradient.
In other words, each color gets 25% of 540 angles, that is 135 degrees and since 360/135 = 2.67, only the last 2 colors and 0.67 percent of the third-last color are shown on the gradient,
let fourColorsGradient = Gradient(colors: [Color.blue, Color.pink, Color.yellow, Color.green])

Rectangle().fill(AngularGradient(gradient: fourColorsGradient, center: .center, startAngle: .degrees(0), endAngle: .degrees(540))).frame(width: 200, height: 200).cornerRadius(100)
As evident from this screenshot, the first color - blue is completely invisible. It exists somewhere, but it's not visible due to insufficient space.
If we want to see blue color, we need to reduce the end angle. If we make it 440, it gives just enough space for the blue color to become visible on the gradient.
Rectangle().fill(AngularGradient(gradient: fourColorsGradient, center: .center, startAngle: .degrees(0), endAngle: .degrees(440))).frame(width: 200, height: 200).cornerRadius(100)
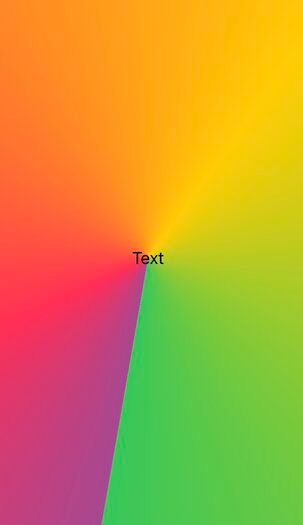
Where to Use Gradients?
As we already saw in the above examples, gradients can be used with fill API on shapes to fill their area with gradient content. All the gradients conform to ShapeStyle and View protocols so they can be used in any function arguments that take these protocol types as arguments.
Similarly, gradients can be used with background API to style backgrounds.
Text("Text")
.frame(maxWidth: .infinity, maxHeight: .infinity)
.background(AngularGradient(gradient: fourColorsGradient, center: .center, startAngle: .degrees(0), endAngle: .degrees(460)))
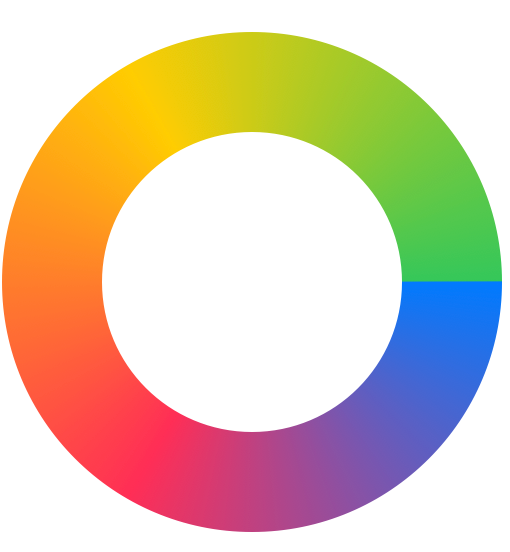
Or even with a stroke API to decorate the border of the content.
let fourColorsGradient = Gradient(colors: [Color.blue, Color.pink, Color.yellow, Color.green])

Circle()
    .stroke(
        AngularGradient(
            gradient: fourColorsGradient,
            center: .center
        ),
        lineWidth: 50)
    .frame(width: 200, height: 200)
    .padding()
Summary
So this concludes my series on gradients in SwiftUI. I hope this three-part series was useful in understanding concepts behind and usage for gradients on the iOS platform. I hope you liked it. As always, reach out to me on Twitter @jayeshkawli or through About me page on this website. If this series was useful to you in any way, please consider donating on Patreon or BuyMeACoffee.

